ESP32 - GPS Tracker
ESP32 is a series of low-cost and low-power microcontrollers with integrated Wi-Fi and dual-mode Bluetooth. In this integration we create a GSP tracker with onboard data caching and synchronization via Wi-Fi. This provides a low cost alternative to using a 4G network for streaming real-time data. As soon as the ESP is powered, for example by starting a vehicle, the location, speed and heading data is cached on the SD card. When the vehicle is within reach of the configured Wi-Fi access point the data is synchronized with the server.
Hardware
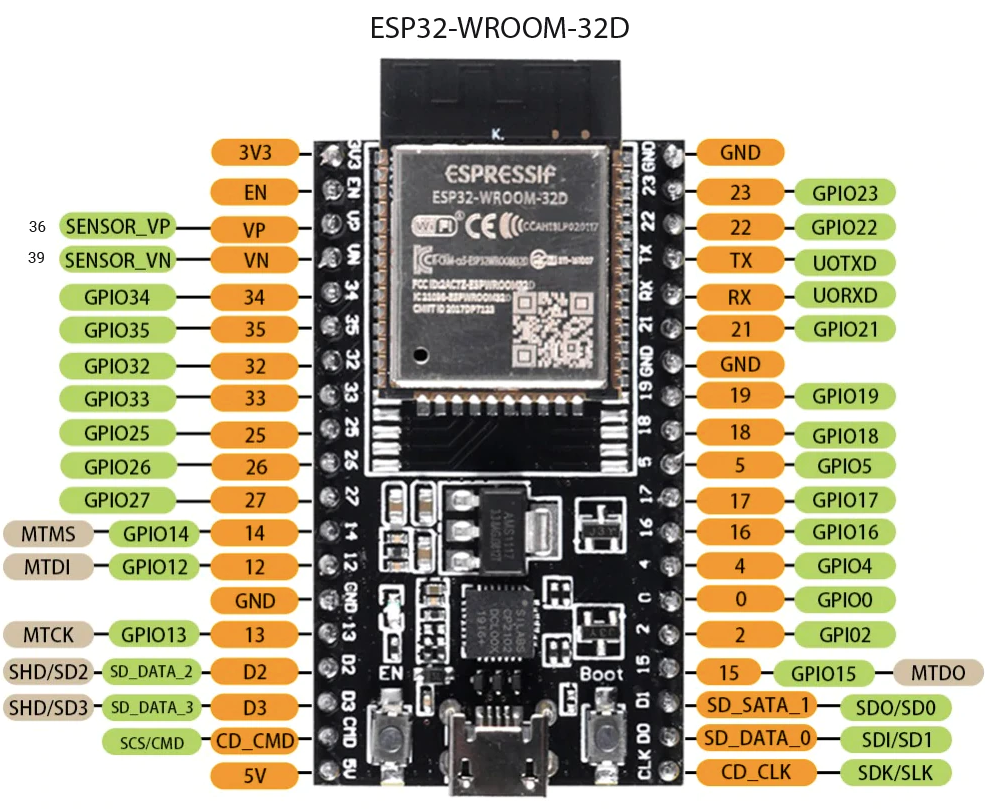
The ESP32 series employs either a Tensilica Xtensa LX6 microprocessor in both dual-core and single-core variations. In this example we use a ESP32-WROOM-32 dual-core development board which is available for around 5 EUR. The pin layout is displayed below.
| GPS | MicroSD |
|---|---|
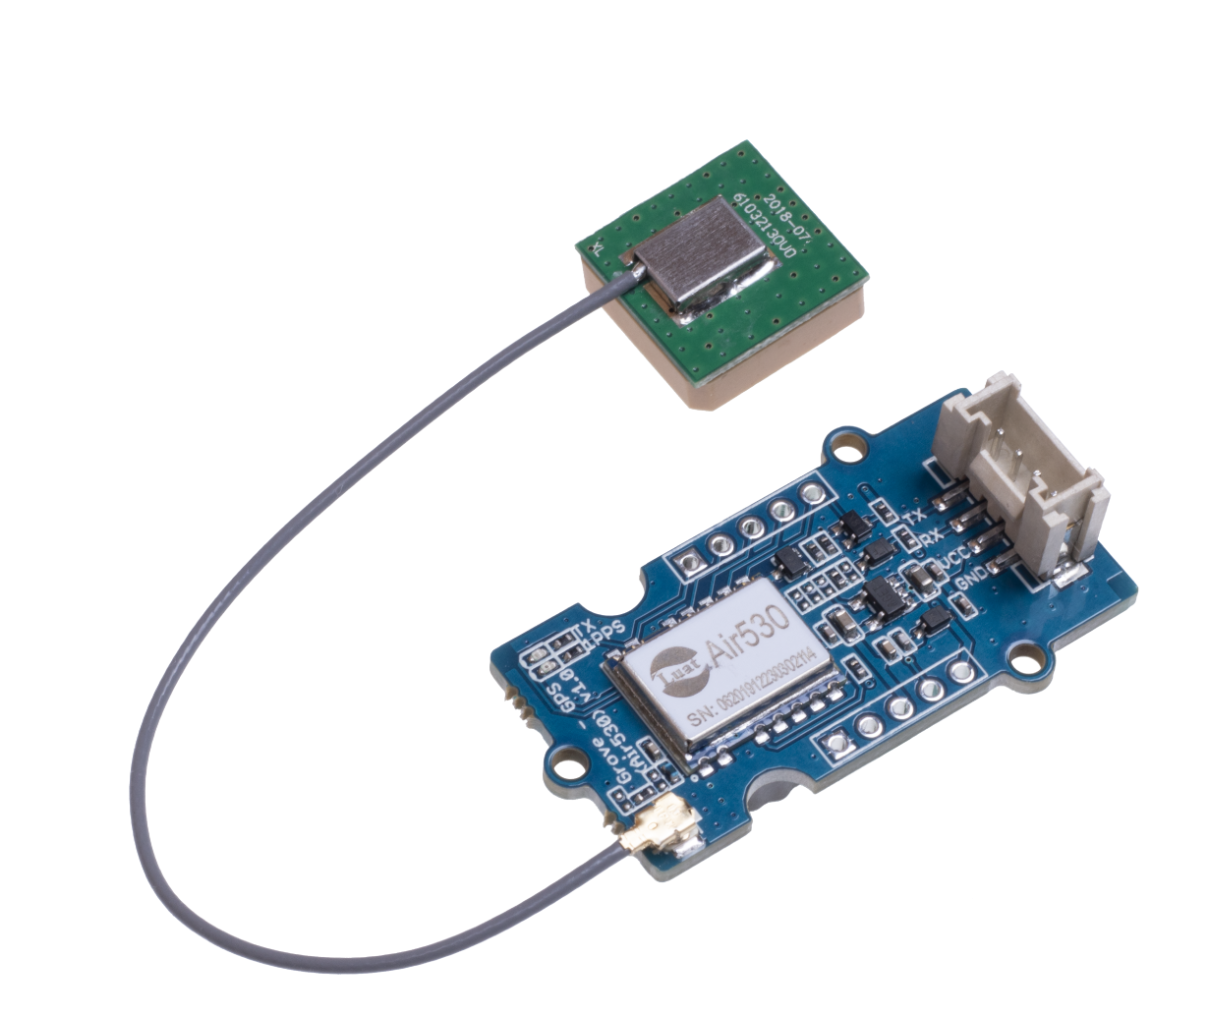 |  |
The Grove GPS sends signals over NMEA. We use the D2 and D2 ports instead of the ESP RX and TX ports so that the standard RX and TX ports remain available for flashing the software.
| ESP32-WROOM-32 | Grove GPS |
|---|---|
| D2 | TX |
| D4 | RX |
| VCC | VCC |
| GND | GND |
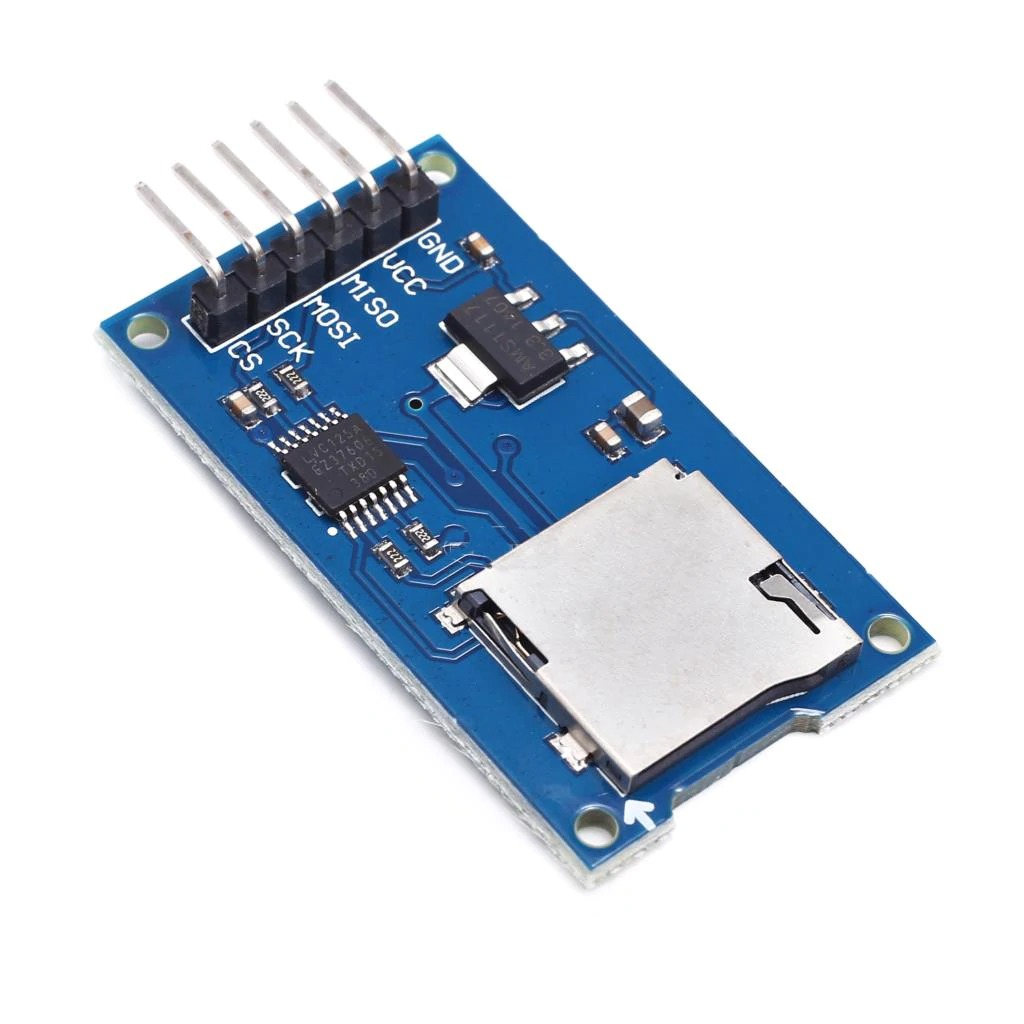
Make sure you connect the Micro SD VCC to the 5V because when connecting to 3.3V it is unstable.
| ESP32-WROOM-32 | MicroSD |
|---|---|
| 23 | MOSI |
| 18 | SCK |
| 19 | MISO |
| 5 | CS |
| VCC | VCC |
| GND | GND |
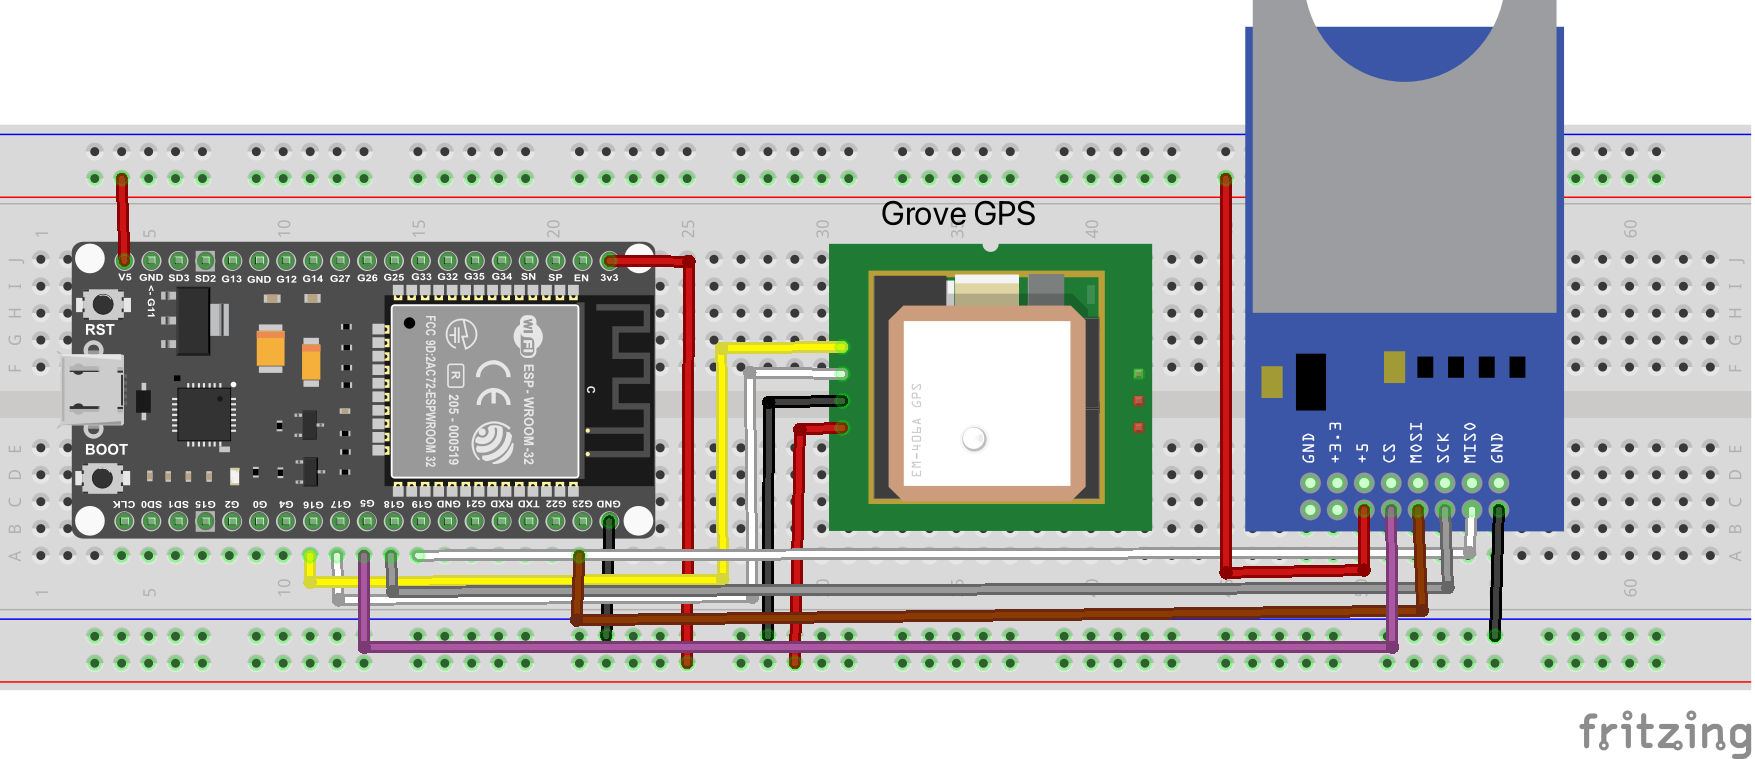
For testing purposes you can use a breadbord with jumpers. An example is displayed below.
Software
The software is written in C++ using the platform.io extension in Visual Studio code. After installing the platform.io extension create a new project and add the ArduinoJson and TinyGPSPlus libraries. Make sure you set insert the following line in the platformio.ini file:
monitor_speed = 115200
Setup
Open the file src/main.cpp. Include the libraties and complete the setup function to intialize the devices:
#include <Arduino.h>
#include <ArduinoJson.h>
#include <HTTPClient.h>
#include <HardwareSerial.h>
#include <Preferences.h>
#include <SD.h>
#include <TinyGPSPlus.h>
#include <WiFi.h>
#include <time.h>

const char* ACCESSPOINT_SSID = "3D-T Logger";
const char* ACCESSPOINT_PASSWORD = "23571113";
WiFiServer server(80);
String token = "";
TinyGPSPlus gps;
HardwareSerial SerialGPS(2);
Preferences preferences;
int counter = 0;

void setup() {
    Serial.begin(115200); // Monitor
    SerialGPS.begin(9600, SERIAL_8N1, 2, 4); //GPS
    SD.begin();
    delay(2000);
    if (!SD.begin()) {
        Serial.println("Initialization SD card failed!");
        while (1)
            ;
    }
    Serial.println("SD card initialized.");
    SD.remove("/cache.txt");
    WiFi.mode(Wi-Fi_AP_STA);
    delay(100);
    WiFi.softAP(ACCESSPOINT_SSID, ACCESSPOINT_PASSWORD);
    IPAddress IP = WiFi.softAPIP();
    Serial.print("Wifi accesspoint ");
    Serial.print(ACCESSPOINT_SSID);
    Serial.print("  ");
    Serial.println(IP);
    server.begin(); // Start local wifi access point
    preferences.begin("tracker");
}
Read GPS sensor
Now we can read the GSP information and log the time, position, altitude, speed and heading to the SD card in JSOn format:
void readGps() {
    while (SerialGPS.available()) {
        gps.encode(SerialGPS.read());
    }
}

String read() {
    String date = "";
    date += gps.date.year();
    date += "-";
    date += gps.date.month() < 10 ? "0" : "";
    date += gps.date.month();
    date += "-";
    date += gps.date.day() < 10 ? "0" : "";
    date += gps.date.day();
    date += gps.time.hour() < 10 ? " 0" : " ";
    date += gps.time.hour();
    date += ":";
    date += gps.time.minute() < 10 ? "0" : "";
    date += gps.time.minute();
    date += ":";
    date += gps.time.second() < 10 ? "0" : "";
    date += gps.time.second();

    String payload = "{";
    payload += "\"topic\":\"";
    payload += preferences.getString("topic");
    payload += "\"";
    payload += ", \"spacetime\": [";
    payload += gps.location.lat();
    payload += ", ";
    payload += gps.location.lng();
    payload += ", ";
    payload += gps.altitude.meters();
    payload += ", \"";
    payload += date;
    payload += "\"]";
    payload += ", \"value\": {";
    payload += "\"speed\": ";
    payload += gps.speed.mps();
    payload += ", \"course\": ";
    payload += gps.course.deg();
    payload += "}}";
    return payload;
}

void log(String payload) {
    File dataFile = SD.open("/cache.txt", FILE_APPEND);
    if (dataFile) {
        dataFile.println(payload);
    } else {
        Serial.println("error opening cache.txt");
    }
    dataFile.close();
    File logFile = SD.open("/log.txt", FILE_APPEND);
    if (logFile) {
        logFile.println(payload);
    } else {
        Serial.println("error opening log.txt");
    }
    logFile.close();
    Serial.print("Log: ");
    Serial.println(payload);
}
HTTP server
Next we run a local HTTP server so that you can connect to the onboard ESP wifi network 3D-T Logger with password 23571113. Open a web browser and connect to the IP adress listed in the monitor (http://192.168.1.4). The ESP should display a web page to enter the credentials for the local Wi-Fi network and the server. The information entered in the form is stored in the ESP32 preferences. This is a persistent key value map that persists through restarts and flashing new code.
void process_parameters(String currentLine) {
    Serial.print("Creditials:");
    Serial.println(currentLine);
    currentLine = urldecode(currentLine);
    const int index = currentLine.indexOf("wifi_ssid");
    if (index > 0) {
        String query = currentLine.substring(index + 10);
        String wifi_ssid = query.substring(0, query.indexOf("&"));
        query = query.substring(query.indexOf("&") + 15);
        String wifi_password = query.substring(0, query.indexOf("&"));
        query = query.substring(query.indexOf("&") + 12);
        String server_url = query.substring(0, query.indexOf("&"));
        query = query.substring(query.indexOf("&") + 17);
        String server_username = query.substring(0, query.indexOf("&"));
        query = query.substring(query.indexOf("&") + 17);
        String server_password = query.substring(0, query.indexOf("&"));
        query = query.substring(query.indexOf("=") + 1);
        String topic = query.substring(0, query.indexOf(" "));
        Serial.println(wifi_ssid);
        Serial.println(wifi_password);
        Serial.println(server_url);
        Serial.println(server_username);
        Serial.println(server_password);
        Serial.println(topic);
        preferences.putString("wifi_ssid", wifi_ssid);
        preferences.putString("wifi_password", wifi_password);
        preferences.putString("server_url", server_url);
        preferences.putString("server_username", server_username);
        preferences.putString("server_password", server_password);
        preferences.putString("topic", topic);
    }
}
void serve_clients() {
    WiFiClient client = server.available();
    if (client) {
        Serial.println("New Client.");
        String currentLine = "";
        while (client.connected()) {
            if (client.available()) {
                char c = client.read();
                Serial.write(c);
                header += c;
                if (c == '\n') {
                    // if the current line is blank, you got two newline characters in a row.
                    // that's the end of the client HTTP request, so send a response:
                    if (currentLine.length() == 0) {
                        client.println("HTTP/1.1 200 OK");
                        client.println("Content-type:text/html");
                        client.println("Connection: close");
                        client.println();

                        client.println("<!DOCTYPE html><html>");
                        client.println("<head><meta name=\"viewport\" content=\"width=device-width, initial-scale=1\">");
                        client.println("<link rel=\"icon\" href=\"data:,\">");
                        client.println("<body><div align=\"center\">");
                        client.println("<h1>3D-T Logger</h1>");
                        client.println("<p>Enter the network name (SSID) and password of the Wi-Fi router:</p>");
                        client.println("<form>");
                        client.println("<table border=0 >");
                        client.print("<tr><td><label>SSID</label></td><td><input type=\"text\" id=\"ssid\" name=\"wifi_ssid\" value=\"");
                        client.print(preferences.getString("wifi_ssid", ""));
                        client.println("\"></td></tr>");
                        client.println("<tr><td><label>Password</label></td><td><input type=\"password\" id=\"password\" name=\"wifi_password\" value=\"");
                        client.print(preferences.getString("wifi_password", ""));
                        client.println("\"></td></tr>");
                        client.println("</table><br><br>");
                        client.println("<p>Enter the information of the server for posting the data:</p>");
                        client.println("<table border=0 >");
                        client.println("<tr><td><label>Server</label></td><td><input type=\"text\" id=\"server\" name=\"server_url\" value=\"");
                        client.print(preferences.getString("server_url", ""));
                        client.println("\"></td></tr>");
                        client.println("<tr><td><label>Username</label></td><td><input type=\"username\" id=\"username\" name=\"server_username\" value=\"");
                        client.print(preferences.getString("server_username", ""));
                        client.println("\"></td></tr>");
                        client.println("<tr><td><label>Password</label></td><td><input type=\"password\" id=\"password\" name=\"server_password\" value=\"");
                        client.print(preferences.getString("server_password", ""));
                        client.println("\"></td></tr>");
                        client.println("<tr><td><label>Topic</label></td><td><input type=\"text\" id=\"topic\" name=\"topic\" value=\"");
                        client.print(preferences.getString("topic", ""));
                        client.println("\"></td></tr>");
                        client.println("<tr><td></td><td><input type=\"submit\" ></td></tr>");
                        client.println("</table>");
                        client.println("</form><br><br>");
                        if (WiFi.status() != WL_CONNECTED) {
                            client.println("Not connected");
                        } else {
                            client.print("Connected to ");
                            client.println(preferences.getString("wifi_ssid"));
                        }
                        client.println("</div></body></html>");
                        client.println();
                        break;
                    } else {
                        if (currentLine.startsWith("GET")) {
                            process_parameters(currentLine);
                        }
                        currentLine = "";
                    }
                } else if (c != '\r') {
                    currentLine += c;
                }
            }
        }
        header = "";
        client.stop();
        Serial.println("Client disconnected.");
        Serial.println("");
    }
}
Wi-Fi client
When the local Wi-Fi ssid and password are entered the connection to the local Wi-Fi network is established. The IP adress of the ESP in the local network is printed on the monitor.
void wifi() {
    String ssid = preferences.getString("wifi_ssid");
    String password = preferences.getString("wifi_password");
    Serial.print("Try wifi");
    Serial.print(ssid);
    Serial.println(password);
    if (ssid == "" || password == "") {
        return;
    }
    Serial.print("Connecting to ");
    Serial.println(ssid);
    WiFi.begin(ssid.c_str(), password.c_str());

    for (int i = 0; i < 5; i++) {
        if (WiFi.status() != WL_CONNECTED) {
            Serial.print(".");
            delay(1000);
        }
    }
    if (WiFi.status() != WL_CONNECTED) {
        Serial.println("Connection failed");
    } else {
        Serial.print("Connected with IP address ");
        Serial.println(WiFi.localIP());
    }
}
Post to server
Once the Wi-Fi connection is established the authentication token can be requested from the server using the username and password entered in the web page. The response is parsed and the token is stored.
void get_token() {
    if (preferences.getString("server_url", "") == "") {
        return;
    }
    HTTPClient http;
    String url = "http://" + preferences.getString("server_url") + "/login";
    String body = "{\"userName\":\"" + preferences.getString("server_username") + "\",\"password\":\"" +
                  preferences.getString("server_password") + "\"}";
    Serial.print("Get token from " + url);
    Serial.print("Body " + body);
    http.begin(url);
    http.addHeader("Content-Type", "application/json");
    int httpResponseCode = http.POST(body);
    if (httpResponseCode > 0) {
        String response = http.getString();
        Serial.println(httpResponseCode);
        Serial.println(response);
        DynamicJsonDocument doc(1024);
        deserializeJson(doc, response);
        const char* auth = doc["Authorization"];
        token = auth;
        Serial.print("Token ");
        Serial.println(token);
    } else {
        Serial.print("Error on sending PUT Request: ");
        Serial.println(httpResponseCode);
    }
    http.end();
}
If a Wi-Fi connection is available the information from the SD card is synchronized with the server via a HTTP post request. The token is stored in the header and the JSON payload in the body
int post(String body) {
    int result = -1;
    if (preferences.getString("server_url", "") == "") {
        return result;
    }
    HTTPClient http;
    String url = "http://" + preferences.getString("server_url") + "/states";
    Serial.print("Post: " + url);
    Serial.print("Body: " + body);
    http.begin(url);
    http.addHeader("Content-Type", "application/json");
    http.addHeader("Authorization", "Bearer " + token);
    int httpResponseCode = http.POST(body);
    if (httpResponseCode > 0) {
        String response = http.getString();
        Serial.println(response);
        result = 1;
    } else {
        Serial.print("Error on sending POST Request: ");
        Serial.println(httpResponseCode);
        String response = http.getString();
        Serial.println(response);
    }
    http.end();
    return result;
}

void sync() {
    File dataFile = SD.open("/cache.txt", FILE_READ);
    String line = "";
    int index = 0;
    while (dataFile.available()) {
        char c = dataFile.read();
        if (c != '\n' && c != '\r') {
            line += c;
            index++;
        } else {
            if (index > 0) {
                Serial.print("Publish ");
                delay(200);
                if (post(line) != -1) {
                    Serial.print("Posted ");
                    Serial.println(line);
                } else {
                    return;
                }
            }
            index = 0;
        }
    }
    dataFile.close();
    bool removed = SD.remove("/cache.txt");
    Serial.println("Cleared cache");
}
Main loop
The event loop listens for incomming connections on the local web server and tries to setup a Wi-Fi connection for synchronizing the data. In this example the GPS is read every 100 milliseconds and the data is stored every 10 seconds.
void loop() {
    if (WiFi.status() != WL_CONNECTED) {
        wifi();
    } else if (token.length() == 0) {
        get_token();
    }
    serve_clients();
    readGps();
    if (counter > 100) {
        String payload = read();
        log(payload);
        if (token != "" && WiFi) {
            sync();
        }
        counter = 0;
    }
    delay(100);
    ++counter;
}
Flash
Connect the board with a USB cable and click on the PlatformIO: Upload icon in the bottom bar. This will compile and flash the code and starts a serial monitor. Connect your Wi-Fi to the Accesspoint 3D-T Logger and enter the password.
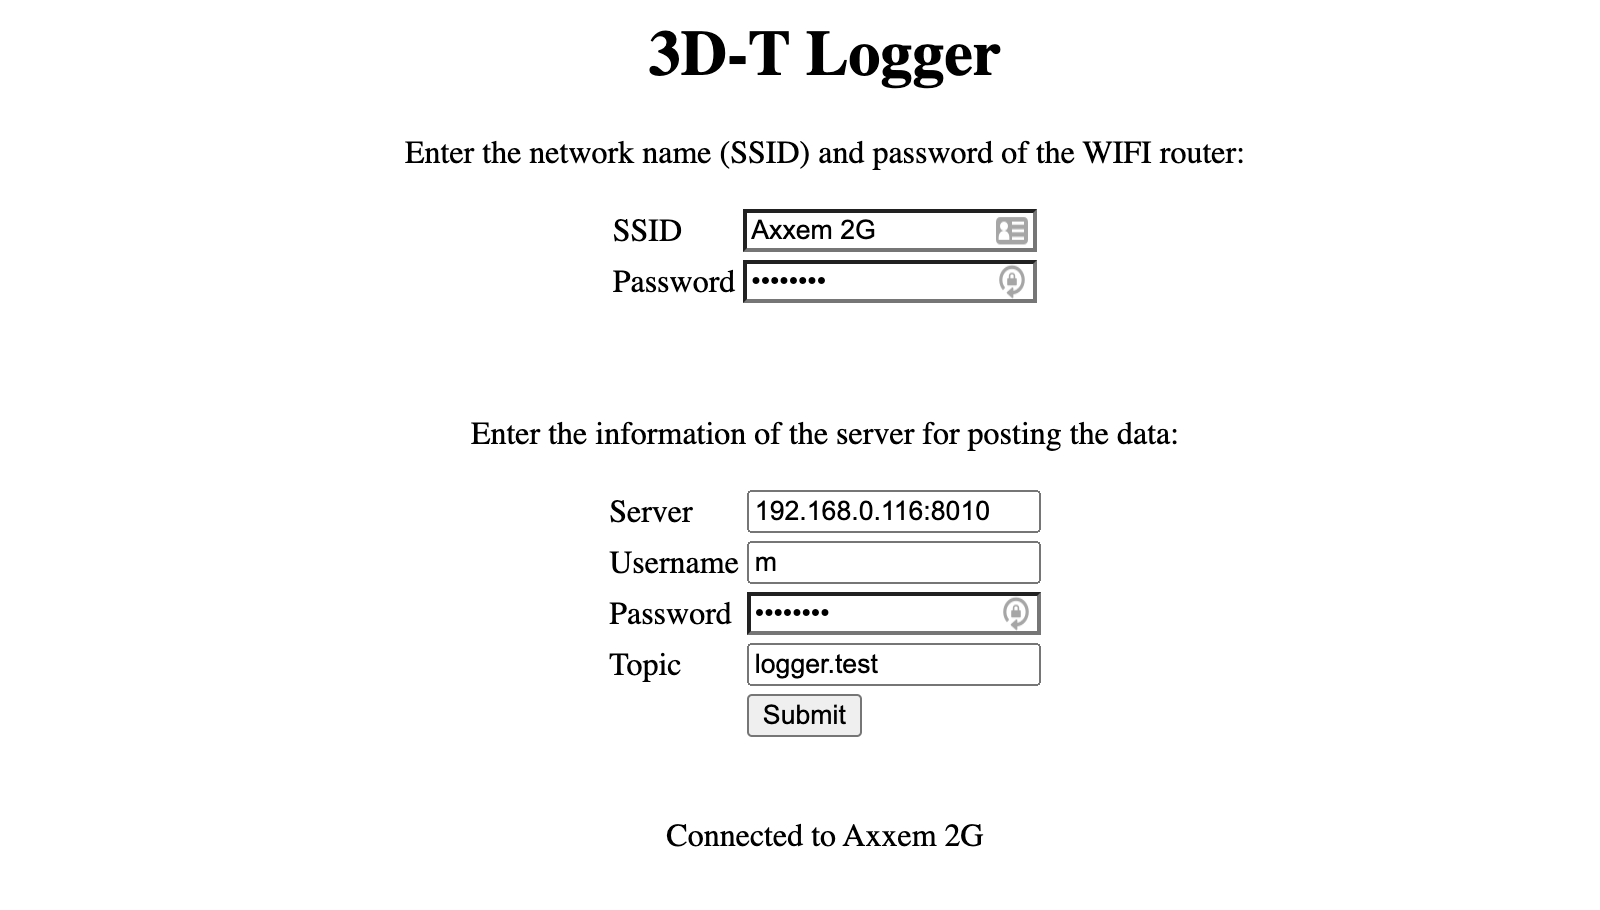
You can now configure the connection to your Wi-Fi router and enter the credentials of the server that the data should be posted to.