Controlling devices
Once the connectors are setup you can control devices by changing the state. Instead of doing the manually for each state you can create automations that set multiple states at once and can be run automatically at scheduled intervals. Automations are created with a visual programming environment based on Google blockly which creates JavaScript code that is executed on the server. You can create the automations by dragging and dropping components like conditional statements or loops.
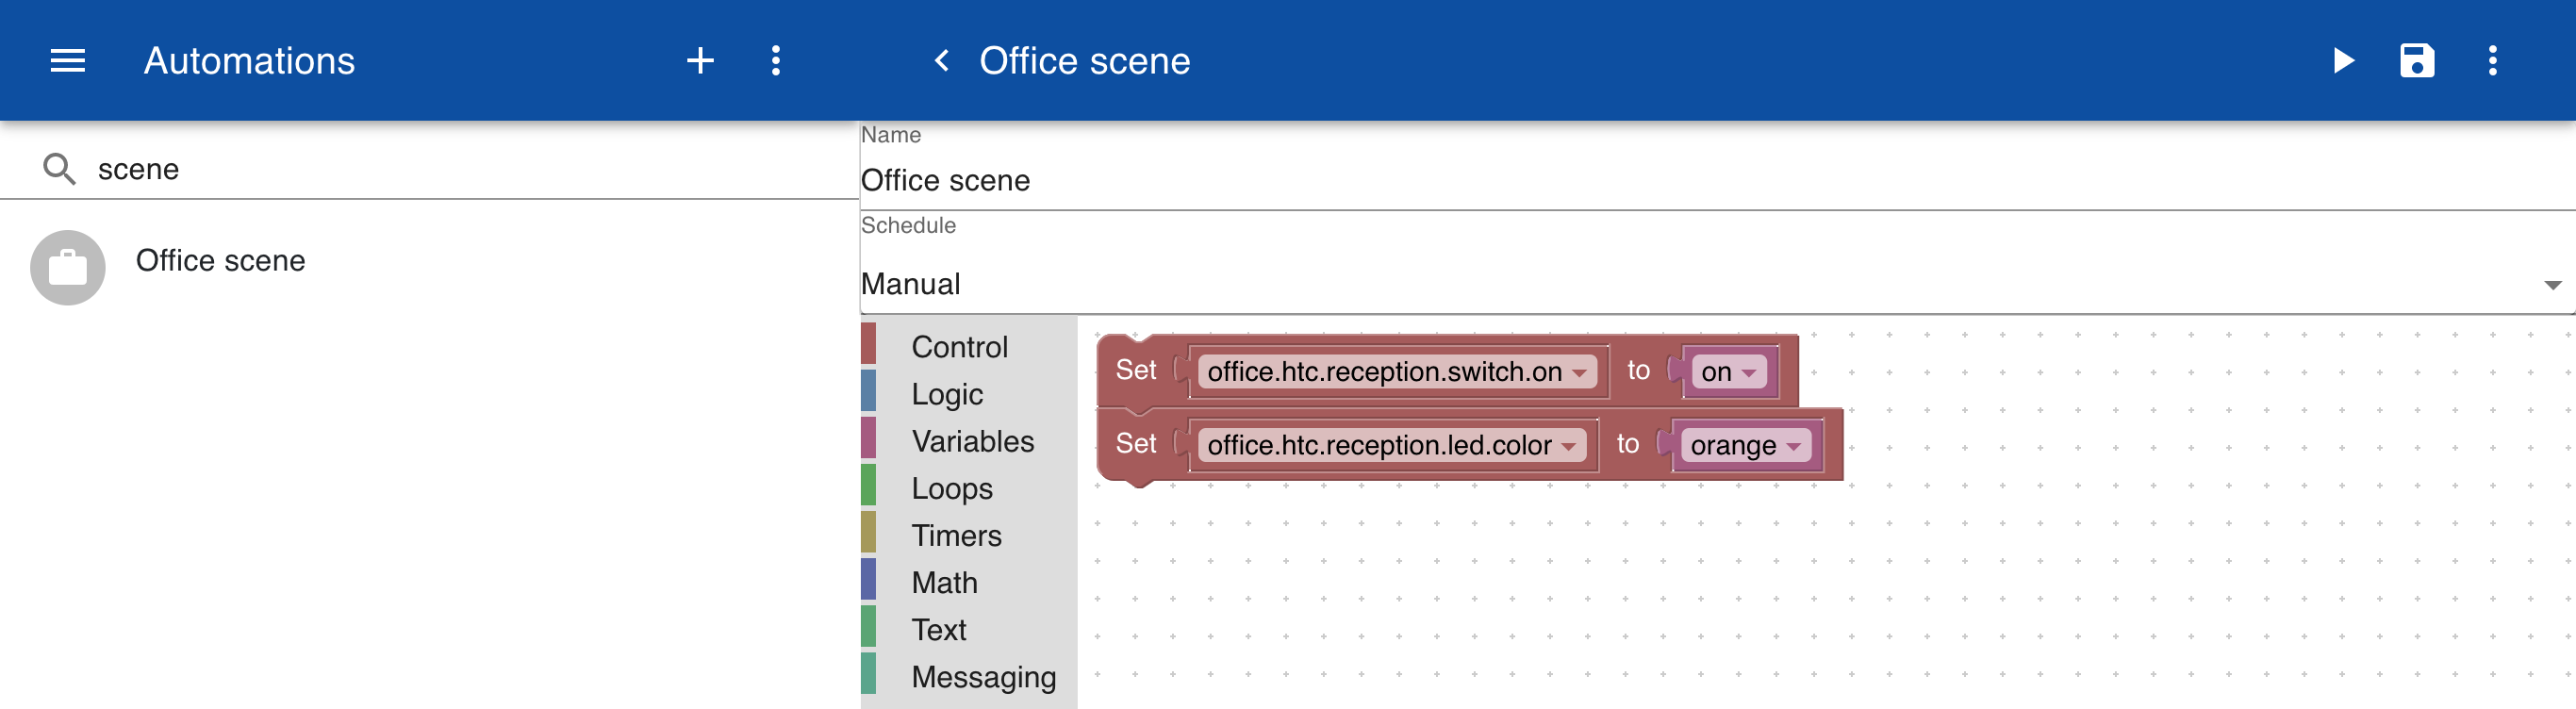
Automation
From the side menu select Automation and create a new automation. Click on the control area in the visual editor. Drag and drop the Set control to the workspace. From the same control drag the dropdown topic selector to the first field of the Set control. You can now select a topic via a drop down menu. After selecting a topic you can select a sub topic.
From the Variables section drag the on\off dropdown and the color dropdown into the second field of the Set controls. When ready click on the Run icon to execute the automation.
Linking automations to topics
Instead of running an automation manually to control a number of items you can also run an automation by creating a form with a button. In the example below we have selected the item Parameter from the Variables menu. The parameter has a name on which is used in a conditional statement that can be found under the Logic section. When the parameter on is set to 1 it turns on a switch and sets a color to green. So, in fact it functions as a master switch to control multiple devices.
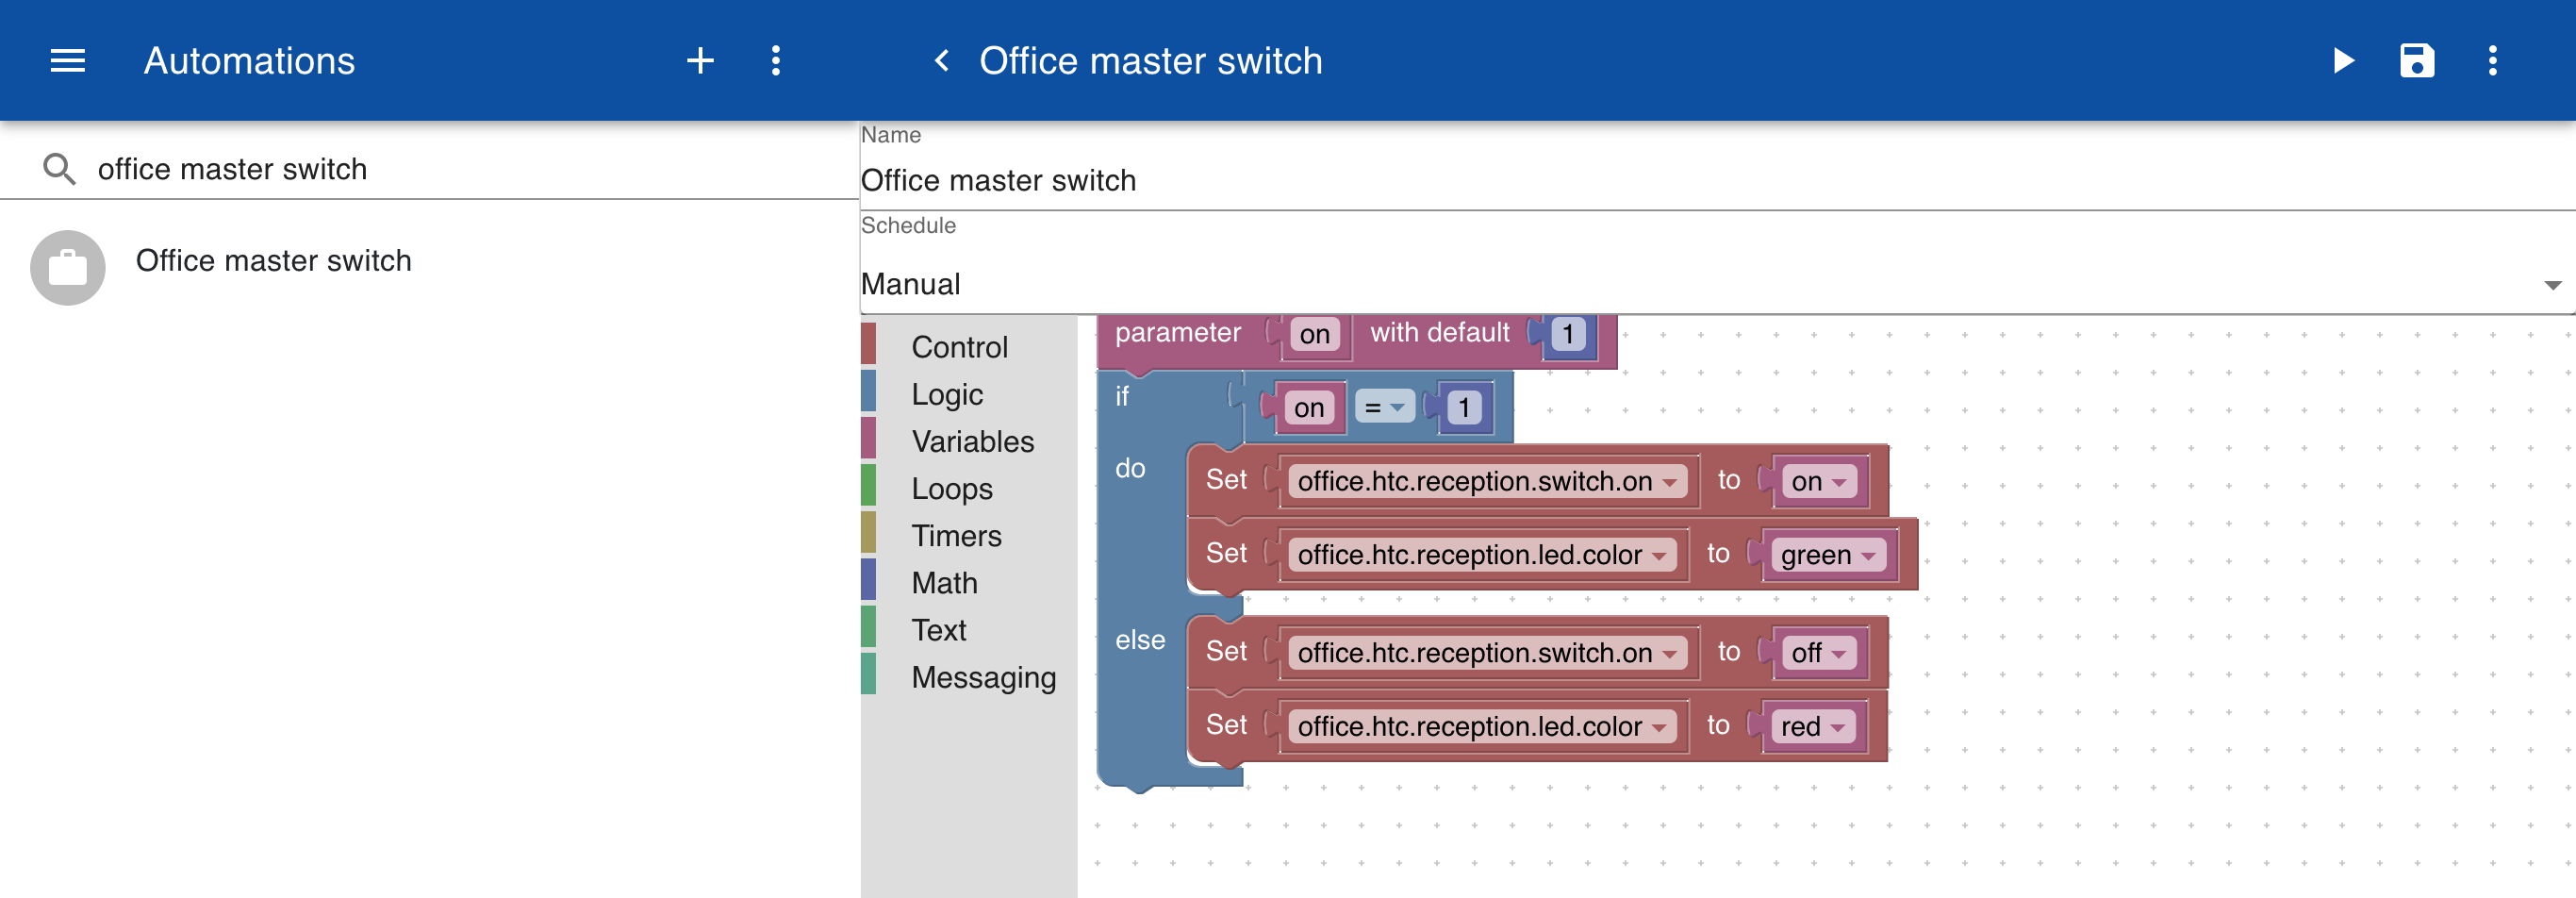
Next we create two new topics for the master switch. On topic specifies the state on as 0 or 1. A second topic links the masterswitch to the name of the automation. If a topic has a subtopic called automation this automation is executed when the state of the sibling topics change. In this case it is the topic offce.htc.reception.masterswitch.on.
offce.htc.reception.masterswitch.automation = Office master switch
offce.htc.reception.masterswitch.on = 0
When you change the state of the on field from 0 to 1 it now will execute the automation.
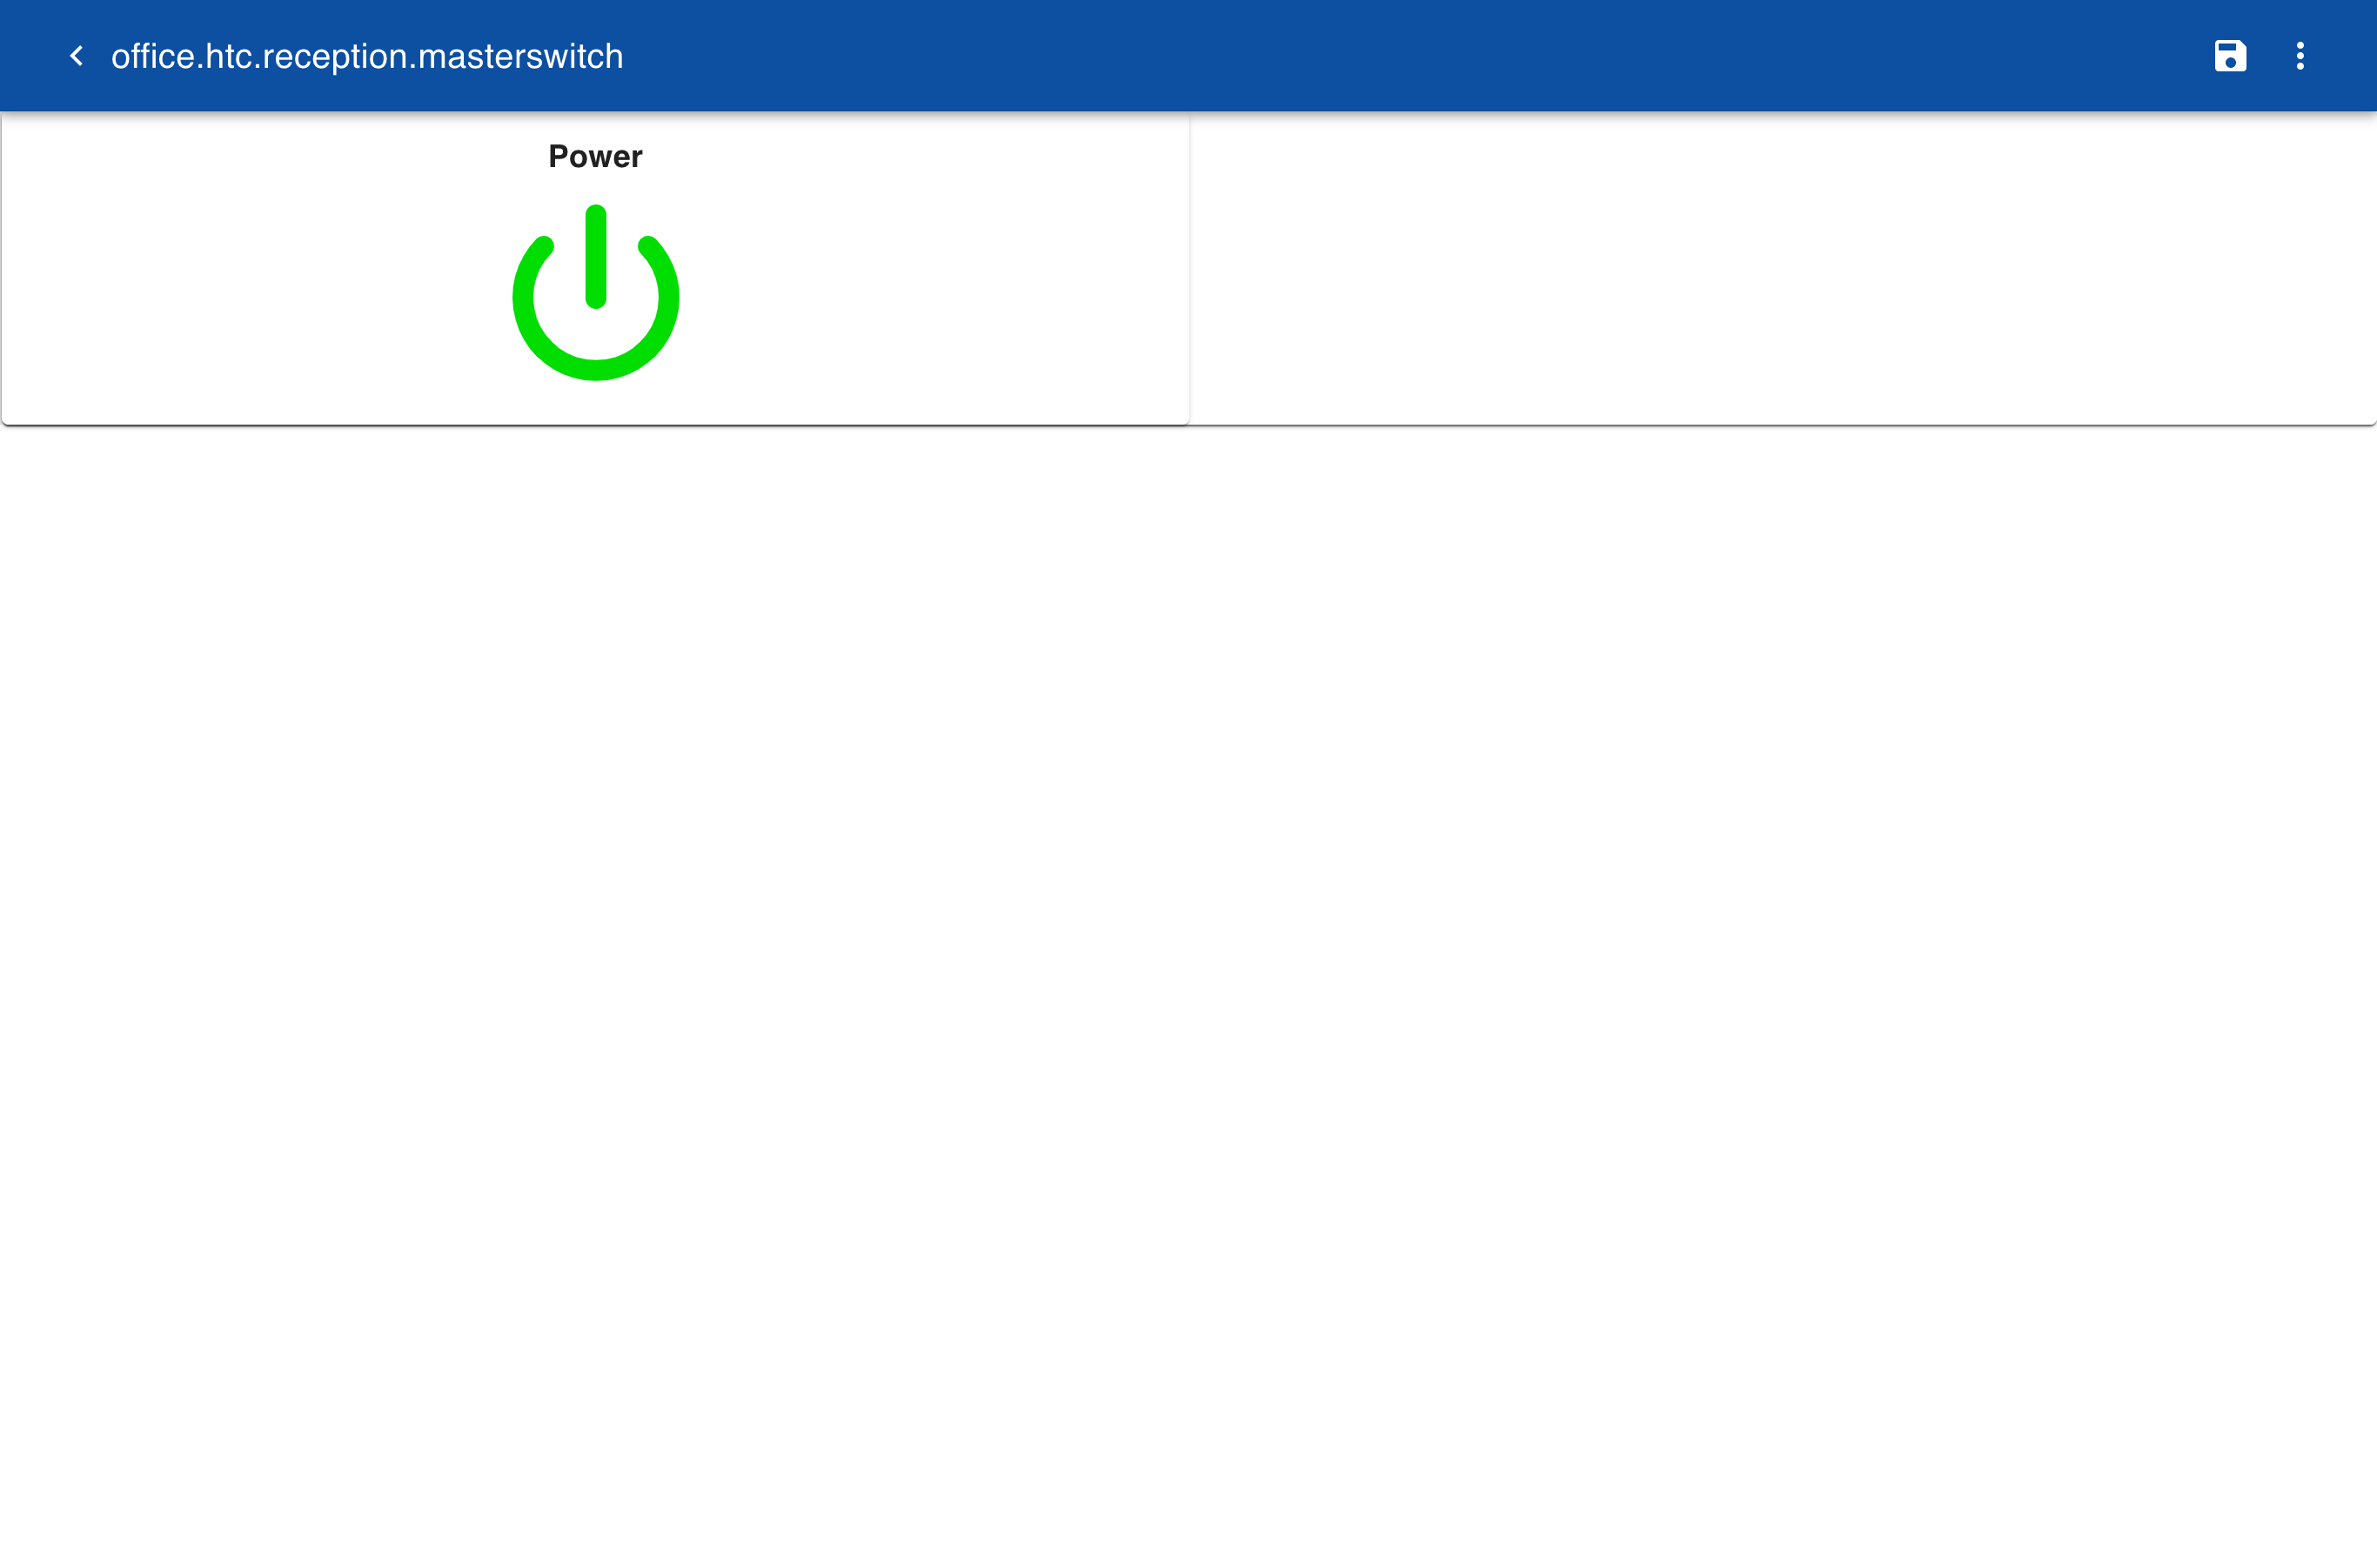
Panel
We can now create a new form with the user interface for the power switch. The definition includes the name of the form and a control. The control has a key on and a label Power and we define the type of control as powerbutton. Make sure you add the word panel to the name of the form because this ensures that the form will open in panel mode, which means that editing of the form is enabled and changes to controls are immediately executed. If you do not add panel to the form name you first have to set the form in edit mode, press the button and than click save to execute the changes.
Office masterswitch panel

on:Power
[powerbutton]
After the form is saved you can now select Items from the navigation menu and search for office.htc.reception.masterswitch. If you click on the item the new form is automatically opened. This is because the name of the subtopics are matched with the names of available forms.