Solar
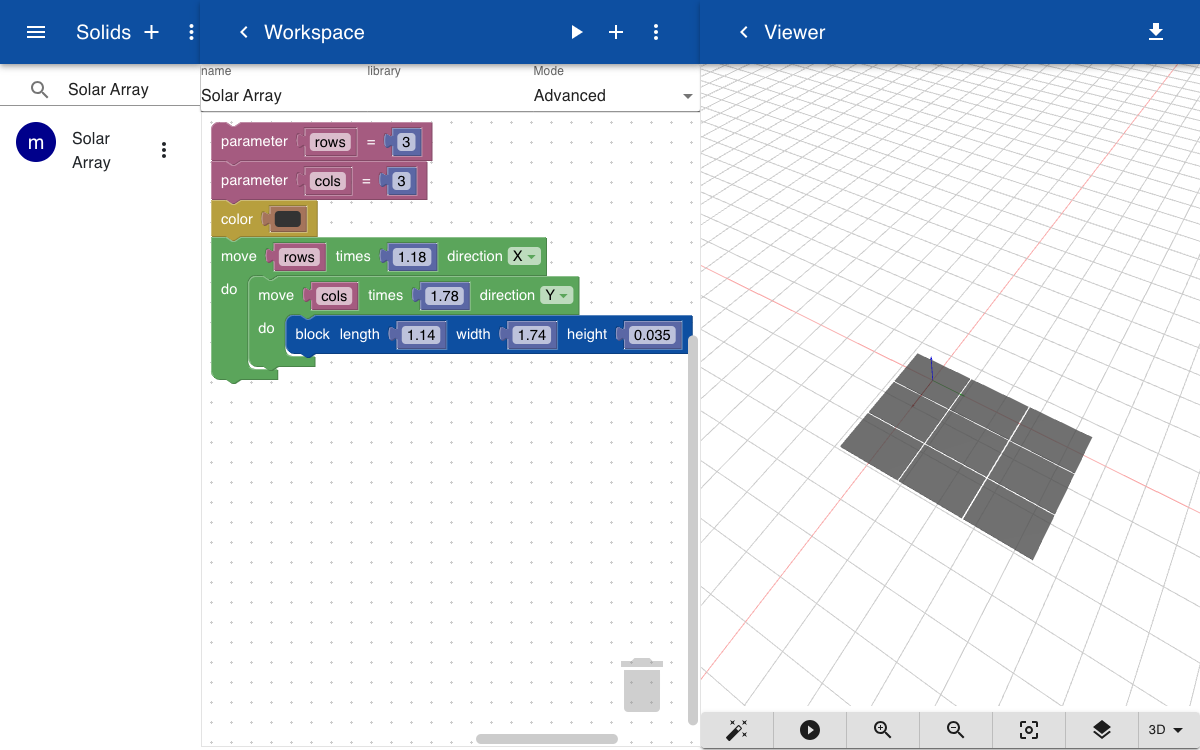
In the previous example we have shown how to model a building system with a glTF file. This example shows how you can create a building system using parametric parts. The advantage of using parametric parts is that the geometry of the part can be updated automatically.
Solids
The solid for the solar array includes a grey block that is repeated a number of times along the X-axis and Y-axis. The number of rows and colums are defined as parameters of this solid.
Topics
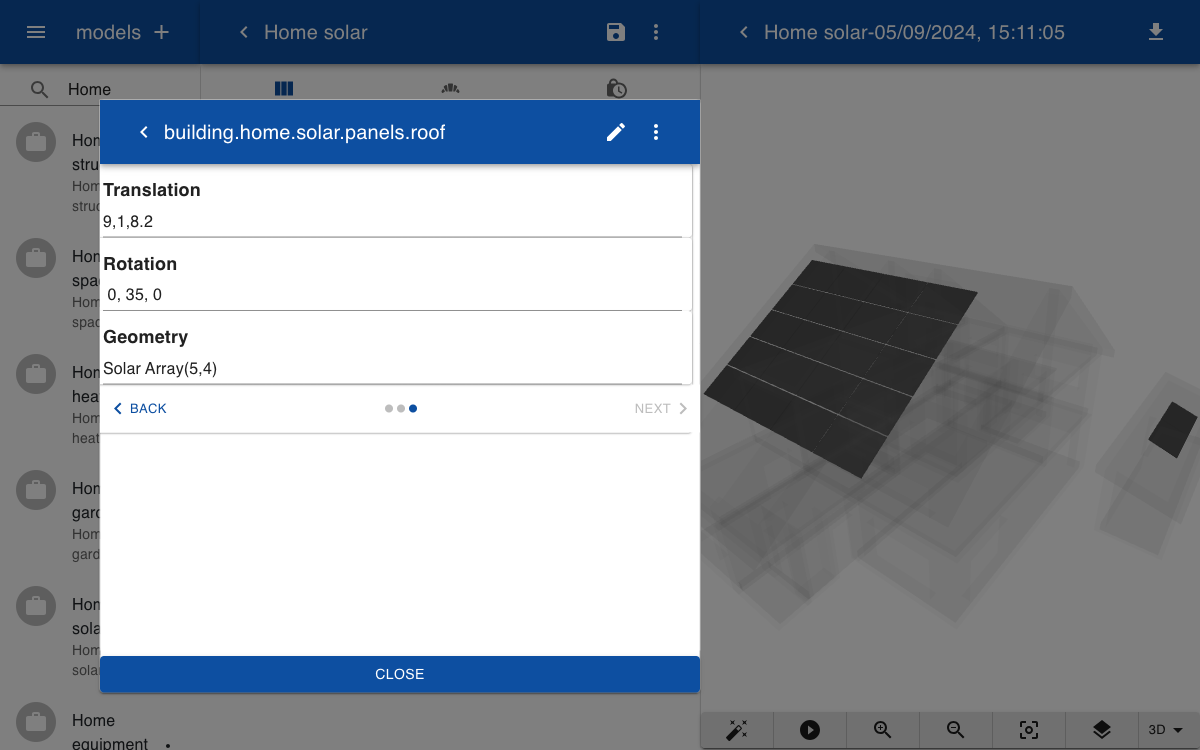
A solar array of 5 rows and 4 columns is created by entering Solar Array(5,4) in the geometry topics. The position and orientation are set by the translation and rotation topics. Real time information about thee current power is obtained by a connector to the SolidEdge API.
building.home.solar.panels.roof.geometry = Solar Array(5,4)
building.home.solar.panels.roof.translation = 9,1,8.2
building.home.solar.panels.roof.rotation =  0, 35, 0
building.home.solar.panels.roof.form = Solar
building.home.solar.panels.roof.power = 1721
A second array of just two panels is installed on the roof of the shed.
building.home.solar.panels.shed.geometry = Solar Array(1,2)
building.home.solar.panels.shed.translation = 2.5,12,2.4
building.home.solar.panels.shed.rotation =  -10, 0, 90
building.home.solar.panels.shed.form = Solar
building.home.solar.panels.shed.power = 172
Form
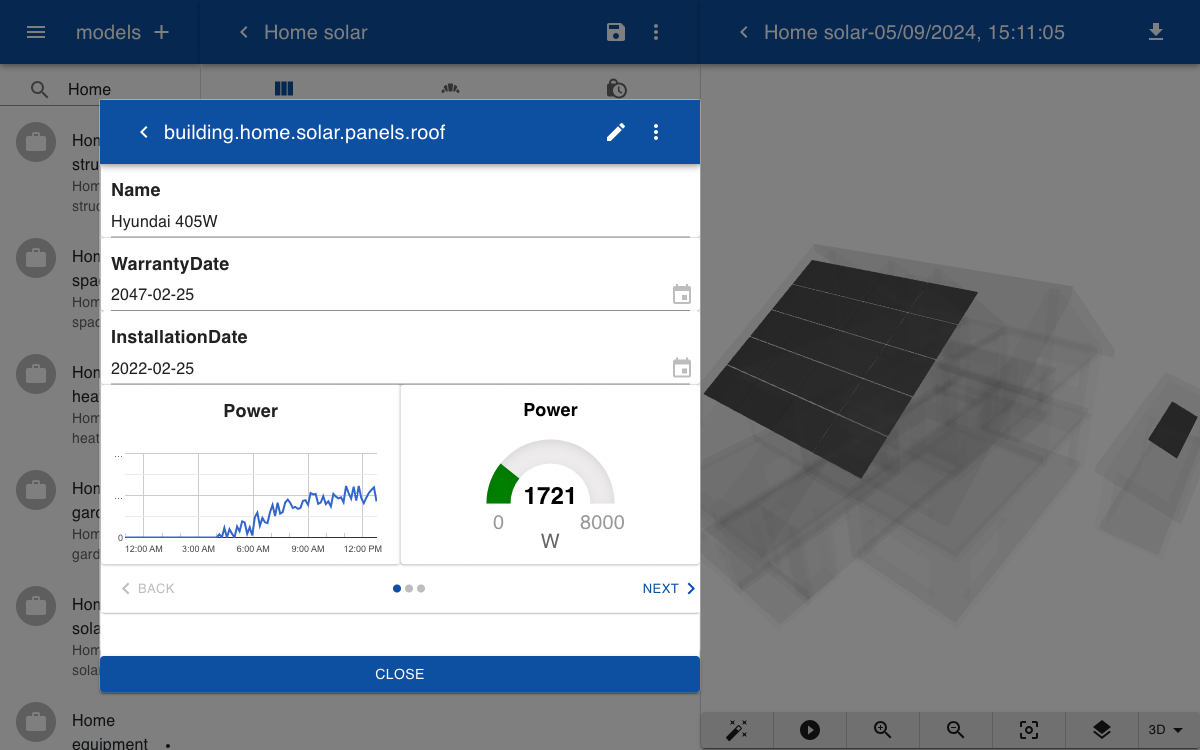
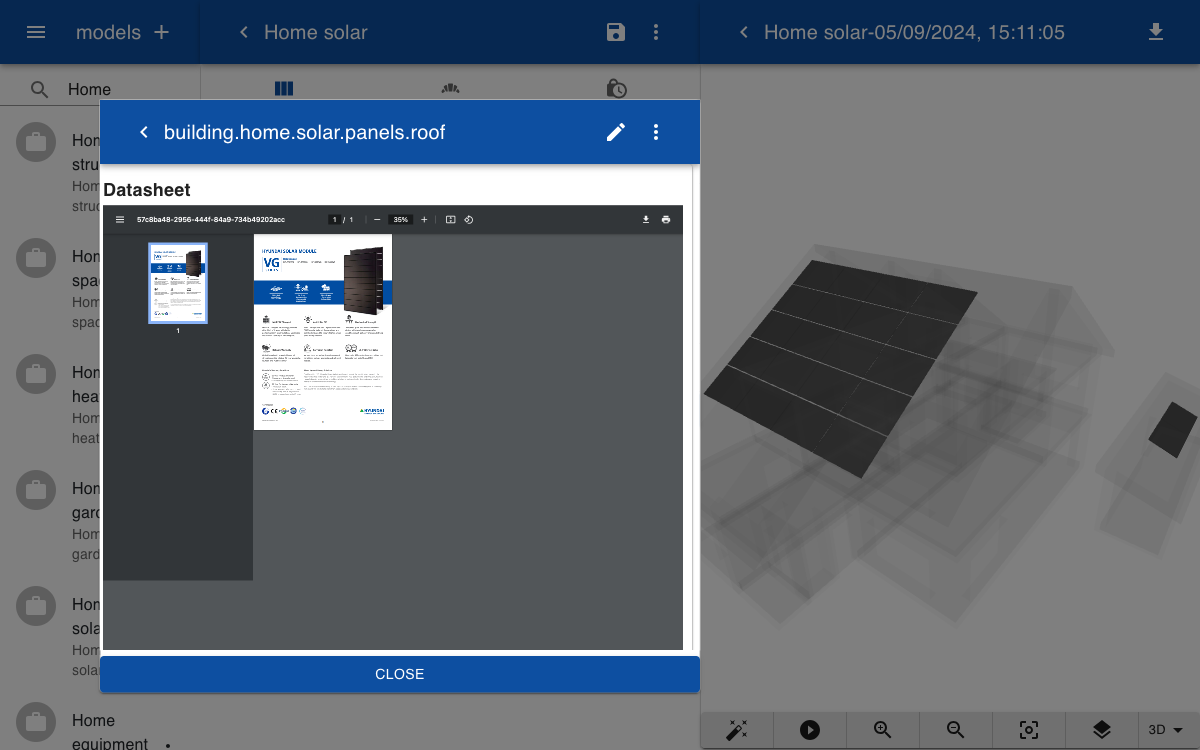
The form for the solar panels includes three pages. The first page shows some basic information about the installation and warranty, current power and power in time. The second page shows a datasheet with technical information about the solar panels. The third page shows the position and rotation and the geometry which defines the number of rows and columns of the solar array.
Solar

Name

WarrantyDate

InstallationDate

Power
[timeline]

Power
[0|1000:lightgreen,1000|4000:green,4000|8000:red 0000 W]

-->

Datasheet
[document]

-->

Translation

Rotation

Geometry
Model
The model includes the topics for the structure and solar system. The structure is rendered in transparent mode with walls and slabs turned on and spaces turned off.
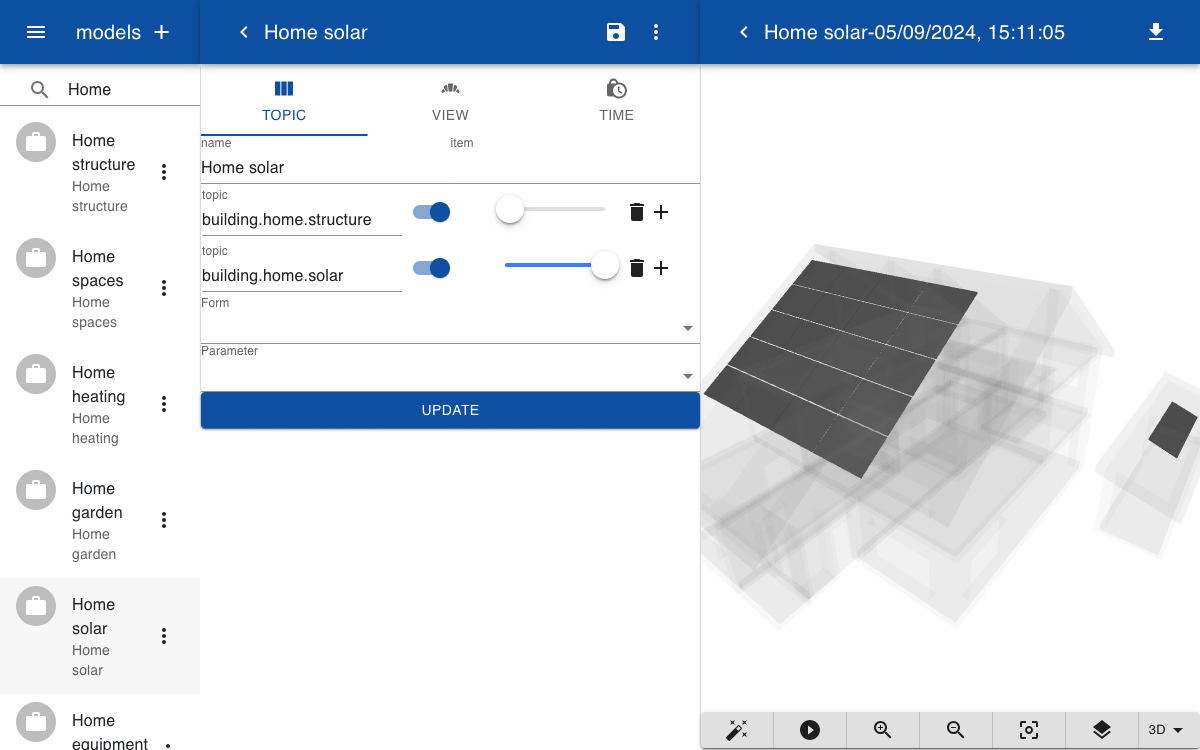
When the user clicks on one of the solar arrays the form is opened information on the current power. By pressing next the datasheet and information about the position, orientation and number of panels is displayed. Note that you can change any of these parameters to move or rotate the solar array or to change the number of columns and rows in the solar array. After clicking on the Save icon the model is automatically updated.